Transformer Oil Sampling- The First Step…Simple but Critical
-
11 October 2017
-
EA Technology
What is going on inside that big grey tank that we call a transformer?
Do you know the easiest way to find out the condition of your electrical assets?
Let me share with you some trade secrets which will help you make the best decisions for the optimal management of your assets. It may sound simple, but the first step is critical… So listen closely.
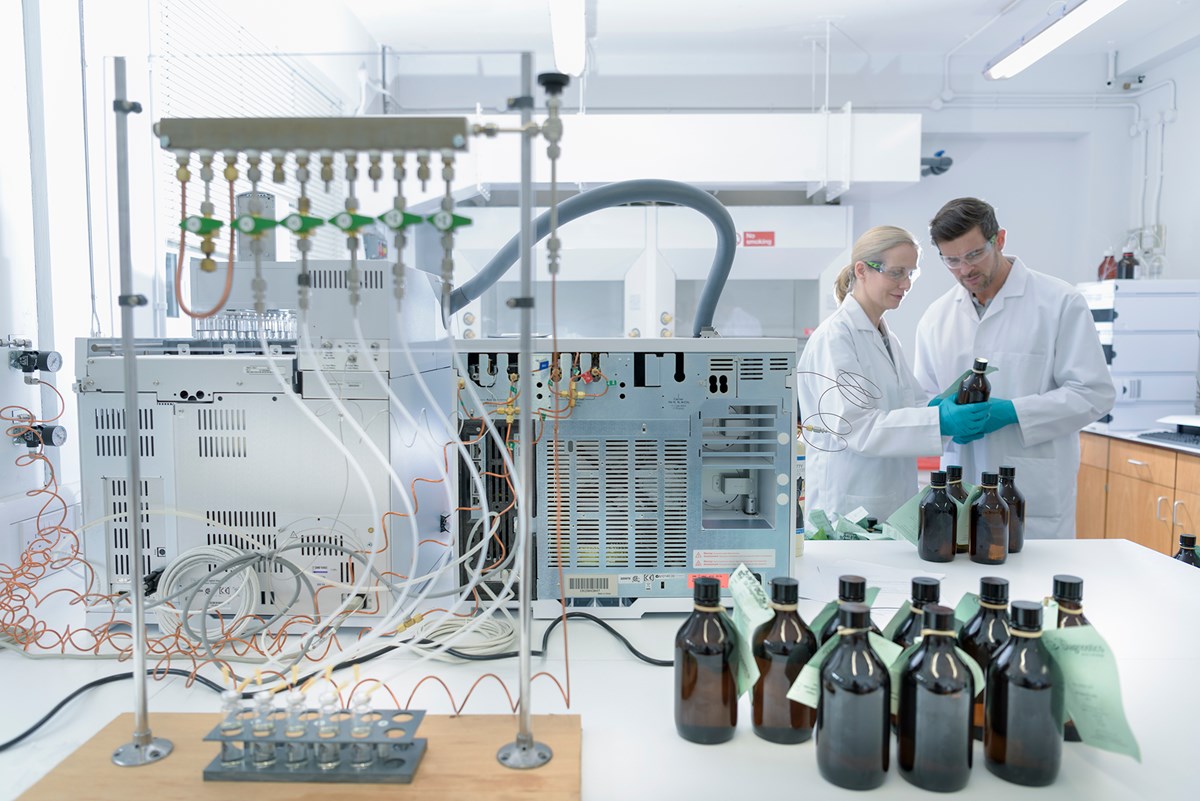
Customers often come to me with their samples and say ‘We have chosen you because you’re the best lab’, while this is fantastic to hear (and I admit, I do love hearing it!), I often find myself wishing they had called me before they started sampling their assets.
The reason… well that’s simple.
While a high-quality lab is vital, the high-quality lab can only produce high-quality results from a high-quality sample!
The good news is this first step is simple if done correctly. It’s about having the correct knowledge and the right tools for the job.
The standard document for sampling is IEC 60475: Method of Sampling Insulating Oils and this is the place to start. It is recommended that all sampling is based on IEC 60475, which details the best practices and the different sample vessels to use dependent on the tests to be carried out.
Step 1
The first thing to consider is are you adequately trained to be taking the sample yourself or should you be getting an expert in to sample the units for you.
Either way you are going to want to know that whoever is taking the sample knows what they are doing.
Step 2
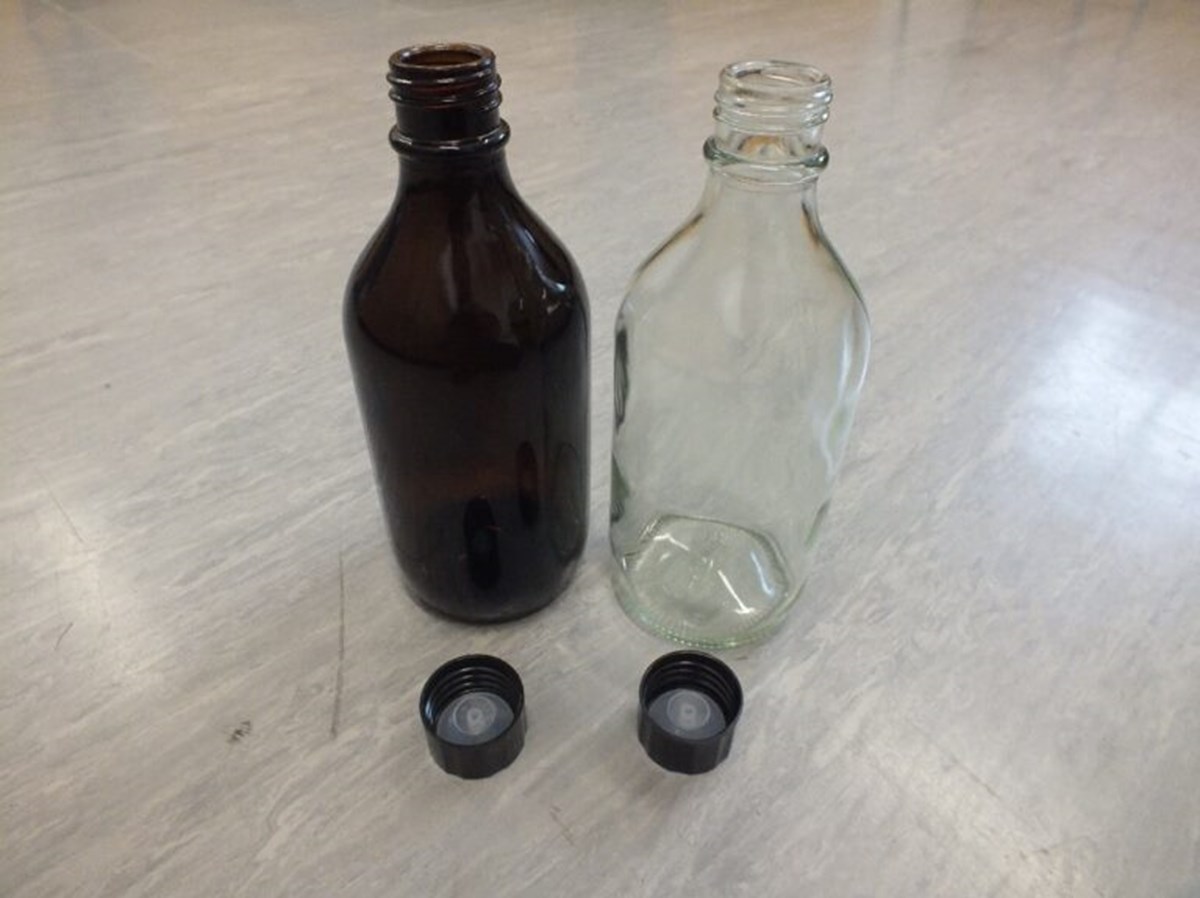
When you look at the options available for sample vessels (and there are more than you think) we would recommend glass bottles with a polycone cap. The reason for this is that you can get enough sample in a 500ml bottle to carry out most, if not all your required examinations and it is the only vessel (along with flexible metal) that is suitable for ALL standard tests. Standard bottles come in clear and amber glass, the amber glass protects the oil from sunlight which is important for Furan analysis.
Step 3
Getting the oil from the unit and into the bottle!
Before you say it, no, cracking the tap and ‘sticking’ a bottle under is not an appropriate method. This will inevitably give you fluctuations and inaccurate oil quality results as you would be pulling in debris, air, moisture etc. from the surrounding environment, not to mention the particulate in the sample tap, cleanliness is key here.
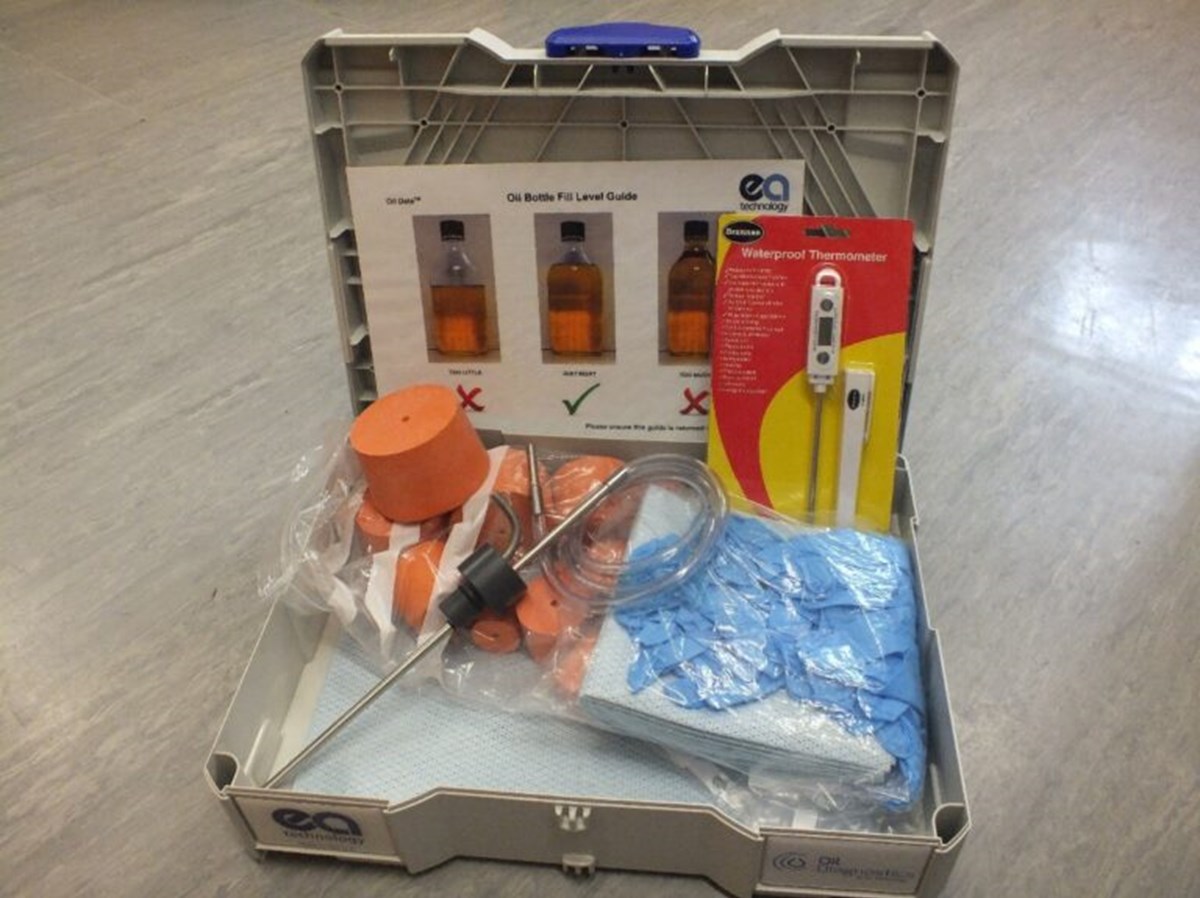
The easiest and best solution is to get yourself a sampling kit or ensure the engineers taking your samples are using one. Here is the type of sampling kit our engineers / clients utilise:
Note: It is good practice to use a secondary valve on the sample tap especially if there is any cause for concern over the integrity of the valve. A secondary sample tap will ensure that if a valve breaks, it holds the oil back until emergency action can be taken to fix the original valve.
It’s important to keep any sampling kit clean after use so it is kept in a good condition and can then be re-used for future sampling requirements.
There is a step by step process that should be followed and if done correctly will ensure a good quality and representative sample is taken:
- Check the weather…if it’s raining try to avoid taking a sample, aim for a nice dry, warm day. Not always possible to plan the weather so erect a canopy / tent over the unit and sampling point and ensure to keep all kit clean and dry. A small amount of rain can affect your results dramatically.
- Clean the sample tap before any sampling is started, use a wire brush and/or lint free cloth to remove and debris form the external surface.
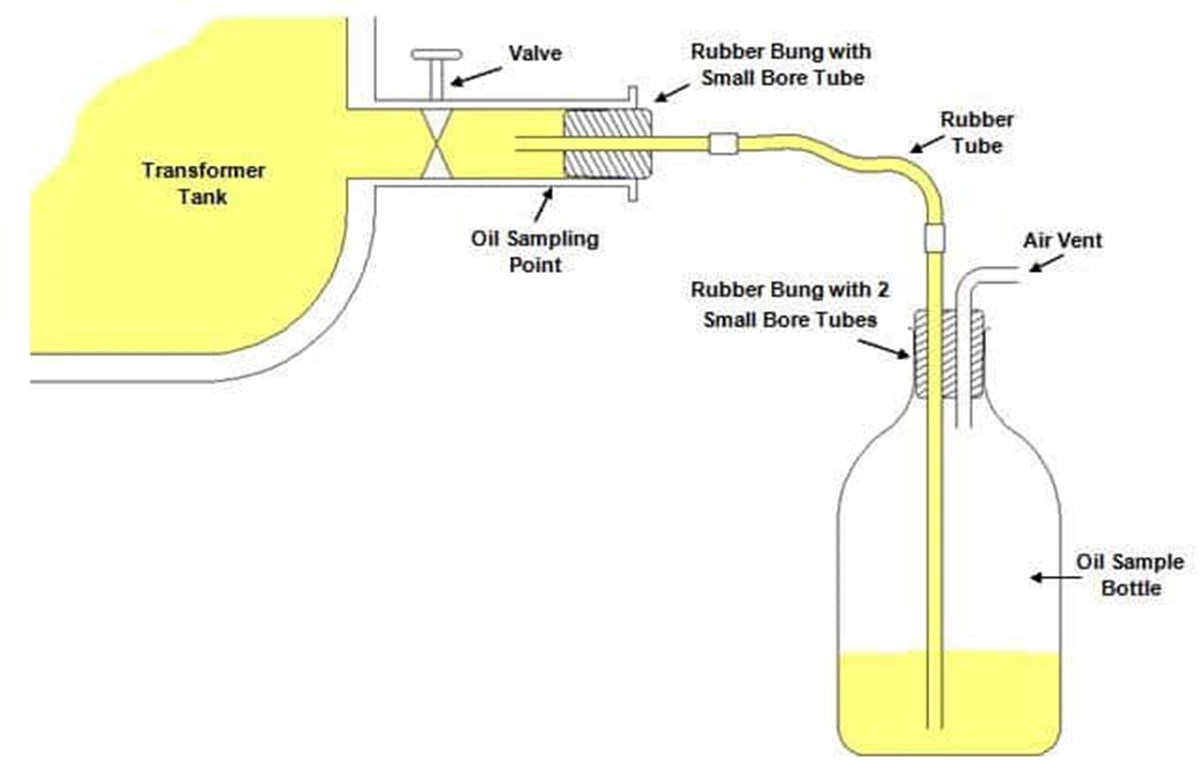
- Connect the correct size oil resistance rubber bung to the sample tap by pushing or tapping it on and don’t forget to attach the stainless-steel tube to the pre-drilled hole.
- Always drain at least 500ml of oil out of the unit and to a waste container before taking your sample, this ensures any debris is flushed out before you take your sample… VERY important.
- The temperature of the flowing oil should be recorded and noted on the sample label, this is required for any accurate moisture determination.
- Rinse out the bottle with the oil to ensure it is clean and warmed so any debris or condensation is removed.
- Attach the bottle bung with inlet tube and air vent tube to the sample bottle. The stainless-steel tube should extend to the bottom of the bottle and ensure a slow flow rate to cause minimum air displacement and oil disturbance.
The bottles should be allowed to overflow and tubing should be withdrawn slowly and the bottle should be tipped to allow some oil to flow out leaving approximately 2cm head space. The reason for this is to allow space for any thermal expansion or volatile gas’s within the sample but not leaving too much which will allow gas to escape from the oil into the headspace.
The cap should be securely screwed onto the sample vessel.
The sample should be cleaned, clearly labelled and securely and safely packed in a carry case or box to ensure safe transport to the lab. We will cover this in our next Blog so stay tuned!
So, there you have it, simple but critical and you should have a good quality representative sample to send to your lab……then it’s over to them!
Jonathan Lewin
Oil Diagnostics – Proposition Lead
Direct Tel: 0151 347 2379
Jonathan.Lewin@eatechnology.com
